
The pavers are sealed and the landscape lighting shows off the fine details of your stonework. Flames from the gas fire pit flicker against the custom blue limestone coping. Another successful project and happy customer in the books. Your mind is already on your next project and numerous referrals are likely coming your way. But a few days later you get that dreaded call, "Hey, the fire pit stopped working and won't turn on". Great.
Luckily for you, our product specialists are gas and fire experts and have the information you need to ensure you never get one of these calls again. Continue reading to discover tips and advice on how to install a gas fire pit.
Fire Pit Lingo
First, let’s run through some frequently used industry terminology.
- Fire Pit Kit - the metal gas fire pit components, may be referred to as a gas insert
- Burner - where gas and flame are released from, sometimes known as the fire ring
- Burner Pan or Plate - the metal surface the burner sits on, can either be flat or "drop-in" with a lip around the top
- Installation Collars or Brackets - provide support from below when using a flat pan
- Ignition System - how the release of gas is controlled and ignited
- Flame Sensor - thermocouple or other component used to identify the presence of flame
- Inches Water Column (W.C.) - how low gas pressure is measured. 1 PSI => 28" W.C.
- Air Mixer - used in propane applications to add oxygen to the gas before it ignites
What to Consider When Installing a Gas Fire Pit
Gas Supply
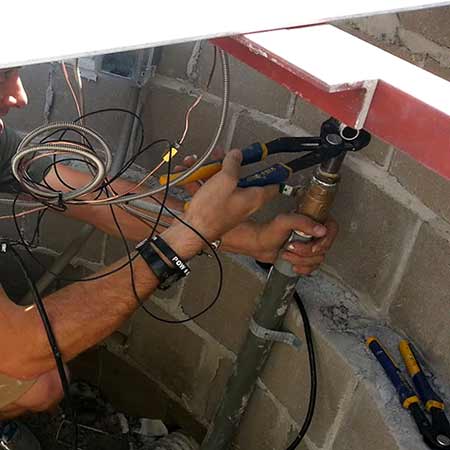
The most common mistake we see is an inadequate gas supply which can have drastic consequences. Running a gas line and building a fire pit is supposed to be a long-term investment; therefore, it’s important to plan accordingly and use high-quality materials to ensure safe operation for many years. Premium fire pit components not only last longer but also have higher BTU outputs for the best and brightest flames. More BTUs requires more gas, and in most cases, the gas line stubbed out of the basement when the house was built won’t suffice. Keep the birthday candle flames for the cake.
It's essential to work with an experienced gas plumber who can properly plan the gas line for the correct volume. Fire pits run on low pressure which is 7" W.C. for natural gas and 11" W.C. for propane. These pressures, coming out to around 1/4 and 1/3 PSI, are common for most any residential gas appliance. Since the pressure is standard, what makes the difference for 300,000 BTUs rather than 50,000? There are many variables at play. Pipe size, pipe material, length of run, meter pressure, number of bends, other gas appliances on the line, pressure drop, etc. A good gas plumber will consider all those variables and make the necessary calculations, typically using the Longest Length Method. You can easily measure pressure with a manometer but you can't easily measure BTUs unless you’re an experienced plumber. Therefore, when you find a good gas plumber, keep them close so you can avoid ever thinking, "How the heck are we going to redo this gas line underneath a finished patio... and who's going to pay for it".
Ventilation
Gas and fire shouldn't be intimidating, but must also be respected. The only time we've seen a hazardous situation unfold was due to inadequate ventilation, especially with propane. Gas leaks can happen but having the right airflow takes it from a precarious situation to a simple fix.
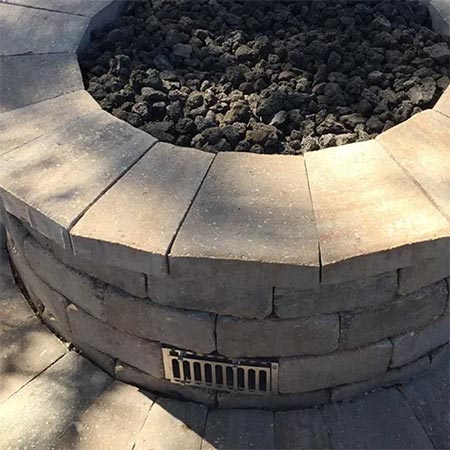
All fire pits need ventilation with the standard being 36 sq. in., ideally on opposing sides for cross flow. Natural gas rises because it’s lighter than air, whereas propane is more dense and will sink and pool up. To allow any gas to escape quickly, placing the vents a bit higher is ideal for natural gas and lower is better for propane. Many pre-made fire pits have feet to prop them off the ground in order to breathe underneath. You can make vent openings more appealing with vent covers, but ultimately, the structure’s walls must have holes or gaps. Ventilation also helps keep the inside dry which is especially important for electronic control systems, and will allow more oxygen to reach the air mixer when using propane.
Water and Drainage
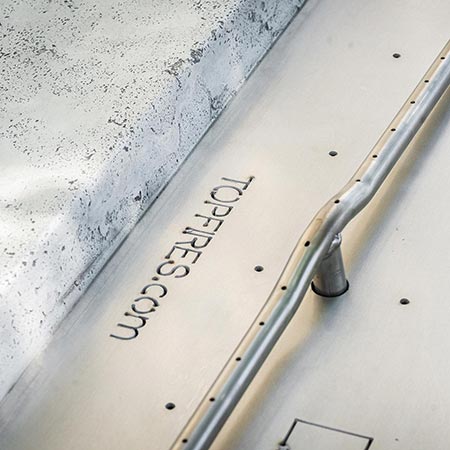
Another reason it's important to have ventilation is because fire pits are made to drain through the interior. Quality gas fire pit kits withstand the elements, but you should prevent water from entering the actual piping. The only real way for water to enter is through the burner itself. If this happens, you could be stuck purging an underground gas line or replacing a costly electronic valve. The best manufacturers design burners to mitigate water risks by incorporating raised center hubs or weep holes. The burner sits on a metal pan which also has holes so water can pass through.
By having a plan for good drainage, water can escape properly and not accumulate or damage electrical components inside. Not to mention, many warranties won't cover water damage as it can and should be prevented. Use a quality burner made to shed water, have drainage and ventilation, and recommend a cover to your client. Additionally, include a good explanation of why it's important, they might even use it!
Safety Features and Local Codes
Basic match light kits can be cost-effective and low maintenance. Turn the key valve to release the gas, stick in a match or lighter, and never worry about electrical components wearing out. However, not all inspectors approve. On top of that, fire pit codes and regulations can vary widely. Nobody wants to swap out a fire pit insert due to a code violation, and typically the fancier kit wasn't part of the budget leaving somebody stuck with the bill. Find out what your area requires so you can budget for the right kit and avoid this situation. We have seen inspectors lump gas fire pits into wood fire pit rules, even requiring a spark screen (you know, for all the sparks).
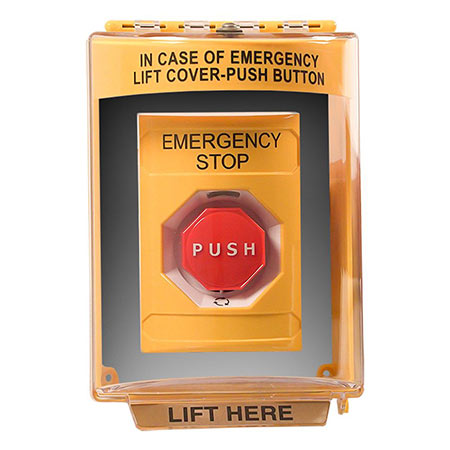
For multi-use or commercial projects you'll typically need to use a CSA Certified or UL Listed fire pit kit with a flame sensor, automatic shutdown, and likely an emergency stop button for patrons. Even if not required, consider the application. If the fire feature will be primarily decorative and largely unattended, how long would it take to notice if the flame blew out but the gas is still on?
Fire Media
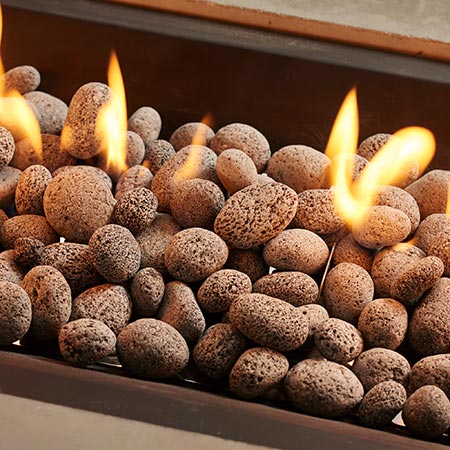
When it comes to finishing touches, there are more options than ever to suit one's taste and aesthetic. This can include fireballs, metal sculptures, fake logs, ceramic river rock, tumbled lava stones, large chunks of lava rock, and more. While it may go without saying, ensure whatever you plan to use is fire-rated. Natural river rock, for example, has moisture trapped inside. When this moisture heats and expands with nowhere to go, the rocks will burst and fly around. Not quite the fire pit memories you want to help create. When using fire glass, ensure there is just enough so the burner isn't visible. If it's too deep, the gas will have difficulty rising through and you'll have flames where you don't want them.
For burners with drilled ports, the media should disperse the gas and ignite over the top. With nozzle or jetted burners, you'll want to be flush with the tips. Avoid 1/4" fire glass for propane gas because it’s packed tightly, preventing gas from passing through. If you plan to use larger decor like fireballs, fake logs, or large pieces of lava rock, you'll still want a base layer of standard lava rock to properly disperse the gas and avoid gaps that make the burner pan visible. Confirm your client knows in advance that any decorative items on top of the base layer will develop soot when in direct contact with the flame. White fireballs, while trendy, might not be the way to go. Unless, of course, you just want the fully functioning gas fire pit for looks and never plan to use it (yes we've seen that).
Burner Pans
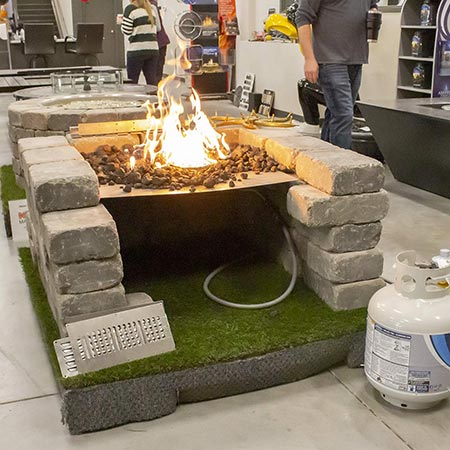
Burner pans can be confusing, so if you're still a bit fuzzy on them, you're not alone. But let us clear that up. The purpose of a burner pan or plate is to create a "false floor" for the burner to rest on and keep the flames high and visible. The lingo can vary but we use "burner pan" as a generic term and within that, we have "flat pans" and "drop-in pans". Using a pan provides easy access for service, prevents having to backfill, and leaves a nice open void inside for ventilation and drainage. It can be tempting to save a few bucks but do it right and you'll thank yourself later. Not to mention, fire pit manufacturers require them.
The typical drop-in pan has a rim or flange around the top and the tray hangs inside the fire pit. While convenient, the metal flange will be visible and some don't prefer the look. Flat pans, on the other hand, give you a more natural result with no visible metal but take an extra step to install as you'll need a ledge inside the perimeter for it to rest on. Installation collars that screw into the masonry or brackets that get sandwiched between a course of blocks can help with this. Some burner pans may have raised sidewalls but no flange around the top, so they still require a support ledge to hold them up.
Make Your Next Project Perfect
Installing a fire feature doesn’t have to be a daunting task and you don’t have to do it alone. The SpotixPro team is here to assist you every step of the way, ensuring you can confidently complete your next project. Whether you need expert advice on installation, maintenance tips, or guidance on selecting the perfect fire pit or fire pit table, our knowledgeable professionals are ready to help. Contact us today to get your next job started the right way. Additionally, check out the best kits we offer here.


